
Pages are an essential part of your website – they’ll display all of your content and give your navigation menu a sense of purpose. This article will explain how to create and manage various types of pages.
Create a page #
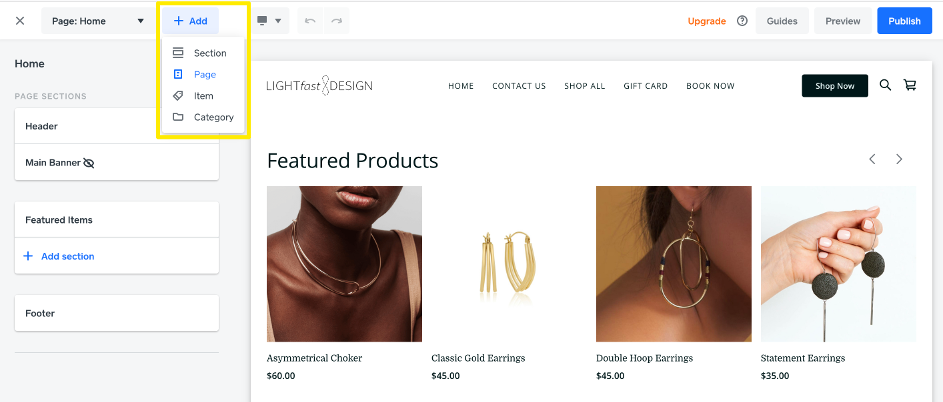
In the website editor, click the + Add button next to the Pages list and choose “Page” from the menu. You can also click on the Pages list and use the Add page link there.
Tip: The Section option will create a new section on the currently selected page. Use this if you would rather add more content to an existing page.


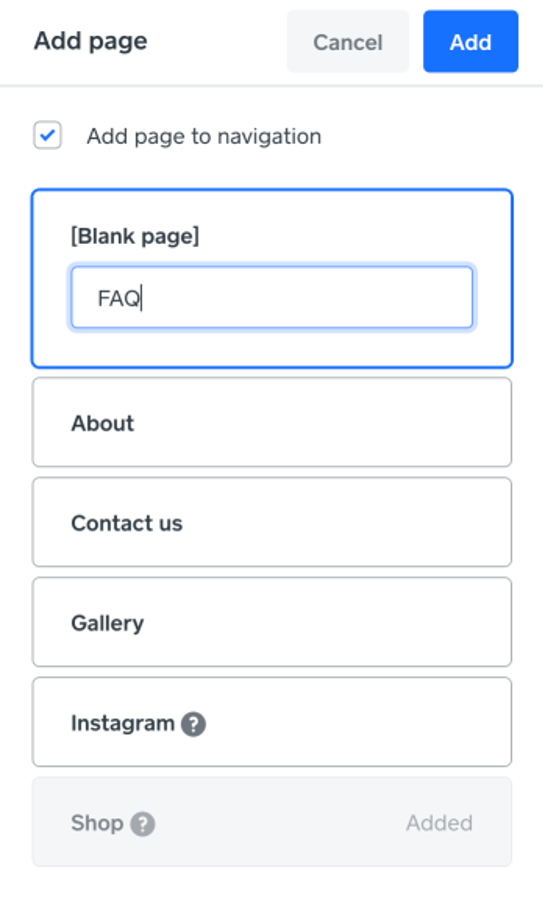
Choose which type of page you’d like to add #
- Blank – just as the name implies, this is an empty page that you can add any kind of content to.
- About – this option will automatically create an informational page with demo content that you can edit and customize.
- Contact Us – a page with a contact form. You can edit and customize the details.
- Gallery – a page for displaying multiple images with a gallery section.
- Instagram – a page that includes the Instagram section that display images from you Instagram feed.
- Shop – If you have an online store set up, this page is already included on your website.
We’ll use a blank page as an example here, but the process for adding any type of page is basically the same. Click on Blank and enter a name for the page. Click the checkbox if you do not want this page to show in your navigation menu, then click Add to finish.

Fill your page #
After saving, you can start building your page or change the settings. Use the Add section button to begin adding text, images, and more. Click the gear icon to access settings for this page, such as SEO properties. Click the “. . .” icon to delete the page.
Arrange your pages #
You can rearrange pages you’ve added to your navigation and organize them by creating subpages. Click inside the navigation menu on any page then click the “Navigation links” button on the left to open the options.
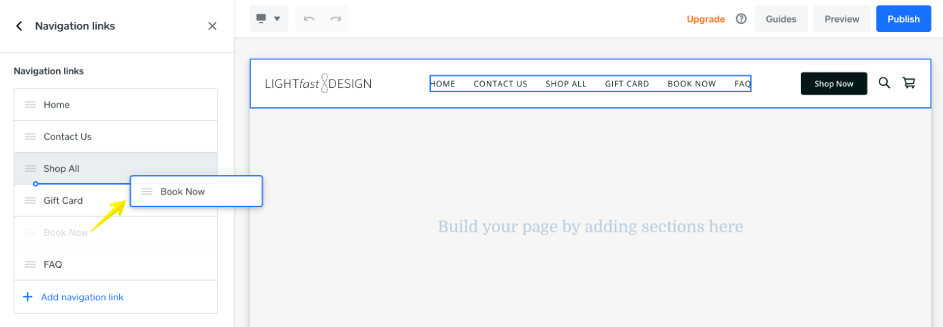
Click and hold on a page in the Navigation list and drag it up or down to move it to a new position. To make a page into a subpage, click and hold on the page and drag it underneath and to the right of the parent page. In the image above, the Book Now page is being moved into place as a subpage of Shop All.
Add a navigation link #
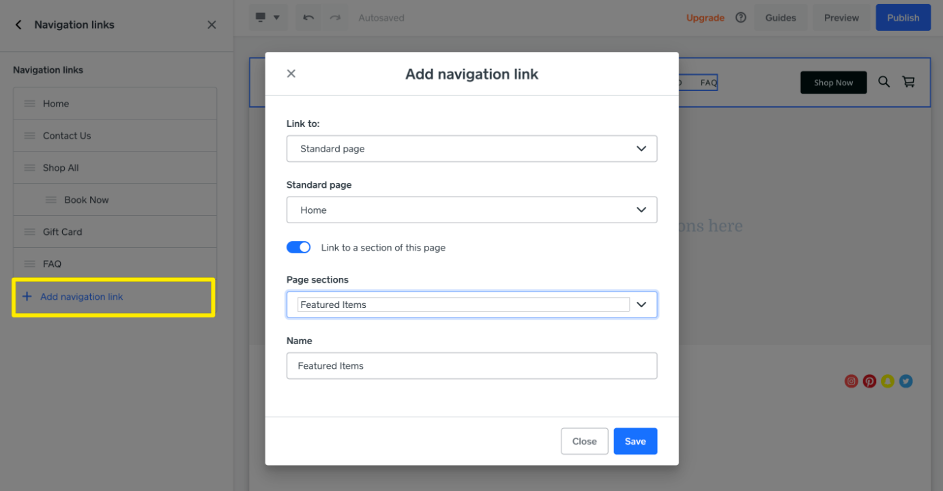
If you want to add another link to the navigation menu, click Add navigation link and select one of the following:
- Standard page – Link to any page you’ve created.
- Category or Item page – Link to a specific category or item from your store.
- Shop All – Create a link to your main store page.
- External link – add a link to a different website.
- File – Link to an uploaded file.
Create an anchor link #
You can also create an anchor link, which is a link to a specific part of a page. For example, let’s say you’ve placed a contact form near the bottom of your home page. You can add a link to the menu that will jump right to the contact form section when clicked. To do so, use the Add navigation link button and select a standard page. Click the toggle to link to a section, then choose which page section you want to link to. Finally, enter a name for this menu item and save your changes.
Don’t forget to publish again when you’re finished!


